Sorry for the lack of updates this week! It was Eric’s
birthday last weekend so we were super busy and then I was sick all this week—stupid
spring colds! Today I am finally getting around to posting our latest wedding
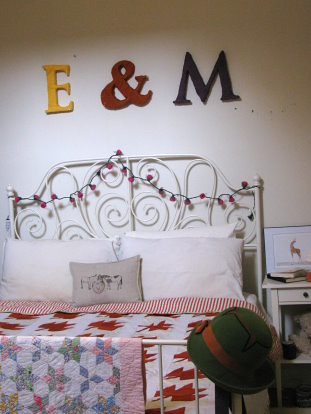
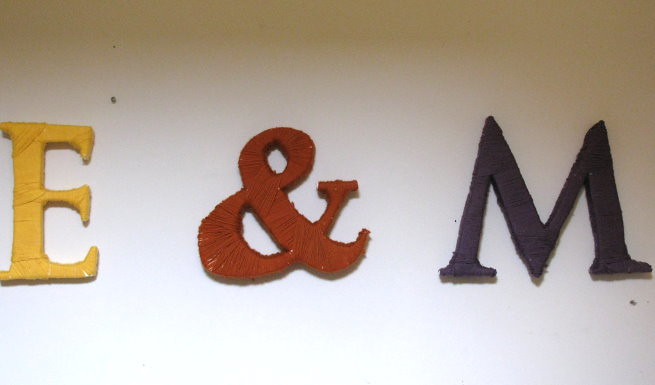
DIY, and it’s an exciting one! I had been seeing on different blogs giant initials
wrapped in yarn and was inspired to do the same. For now they’re on our bedroom
wall, but at the wedding we’re hoping to use them on the wall behind the head
table or perhaps on the table itself. It was very easy to do!
Materials:
For three 11inch high letters
- 1 inch thick foam core (most commonly used as backing in
picture frames and can be bought at craft stores)
- Yarn, twine, or thick string (we used the cheapest yarn from the sale room of
a local shop because you don’t need the best quality)...we threw out the
wrappers before looking at how much yarn it took, but we bought three standard
balls of yarn and almost used the whole pack.
- Computer with a font that you see best fit
- Printer to print out letters in largest size
-Make shift projector or a real projector (we used a desk lamp and the plastic
cover to our record player)
-Knife to cut through the foam core
-Glue
1) Making the letters: Start with finding a font that you like best for your letters. Eric and I used
two different fonts because the ampersand looked odd in the font we liked for
our letters. Make each letter the biggest size you can on a single piece of
paper. If you can, set your font to print outline only to save ink (the font we
chose apparently couldn’t print in outline, oops) and print your letters. Now you can cut out those letters and trace them on your foam core, but if you’re
like Eric and I then it’s “go big or go home” and those letters just aren’t big
enough for you.

2) Projecting the Letters: Eric had the idea to projector our letters in order to make
them larger and still be able to trace our chosen font (if you’re skilled you
could do it free hand, but neither of us are very good at drawing). He took the
lid to our record player (any clear object will do as long as it’s large enough
for your letter), placed the cut out letters on top and illuminated them with
our desk lamp. He had to keep his hands very steady while I traced the letters, but in the end it
worked out just fine! To make sure all of our letters were the same height we
left a ruler on the page as a guide.
*If making the letters seems difficult I have seen people use already made wood
letters, but Eric and I couldn’t find any that were cheap/nice enough*
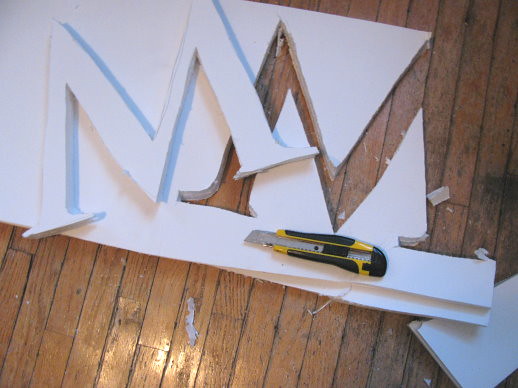
3) Cutting out the letters: Eric and I could only find ½ thick
foam core so we split our sheet in half and glued the two sides together,
waited for it to dry, and then cut out
our letters. We started cutting with a utility knife, but it was super
difficult to cut through the foam core so we ended up using a serrated kitchen
knife (be SUPER careful doing this). We cleaned up our letters a bit with
scissors just to even it out a bit, but really it doesn’t matter too much. We
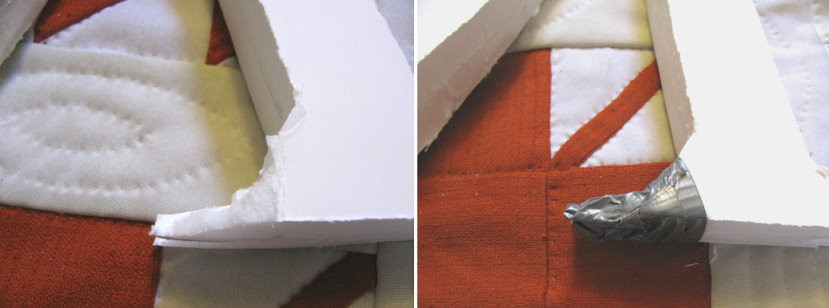
had one problem were almost an entire corner fell off but we just remade it
with duck tape (you’re just wrapping the letter anyway so any imperfections are
going to be covered)
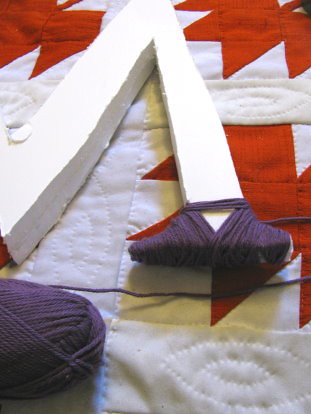
4) Wrapping the letters: This was not as easy as expected,
but with some patience and do-overs wrapping
the letters did get completed. We tried to start at difficult corners (like
the M pictured below) and just went with the flow from there. The rounded
corners of the ampersand took some time, but we found the more we wrapped the
better it looked. At the end we cut out a few pieces of yarn and glued them to
the ends we couldn’t wrap (the edges of the letters) and VOILA! We have
beautiful wrapped letters!